8 min to read
Shiny development and deployment
Basics of shiny app development and deployment

Do you analyze and generate plots and stats in R statistical programming language??
Ever wondered how all the analysis you have done, the plots you have generated and the results of the numbers you have crunched can be delivered to the viewers in a more presentable and an interactive way??
This is where Shiny comes to the rescue… Developed by Winston Chang, a software engineer at RStudio, and is the developer behind many other well known R packages including ggplot2, and devtools packages.
Read more about his work on the RStudio resources section and his contributions to the R universe on the R collaborators documentation.
This blog tries to provide with a basic overview, of stepping into the arena of shiny app development rather than an in detail technical guidance for developing a shiny app. Here, I will outline the key components which are the basis for any shiny application and the mastering of which will provide a strong foundation towards building more sophisticated applications later on.
What is Shiny?
Shiny is an open source package given to all of us R fanatics by the generous Hadley Wickham and his RStudio team. Shiny package provides a web application framework to create interactive web applications (visualization) called Shiny apps.
Shiny provides automatic, reactive binding between inputs and outputs (which we wil look into in the latter part of this blog) and also awesome pre-built widgets which make it possible to build attractive and effective applications with minimal effort especially for those of us who come from a non-software engineering background.
Core ingredients of Shiny
Any Shiny application is brough to life via two key components;
- UI (User Interface)
- Server
- A call for the shinyApp function
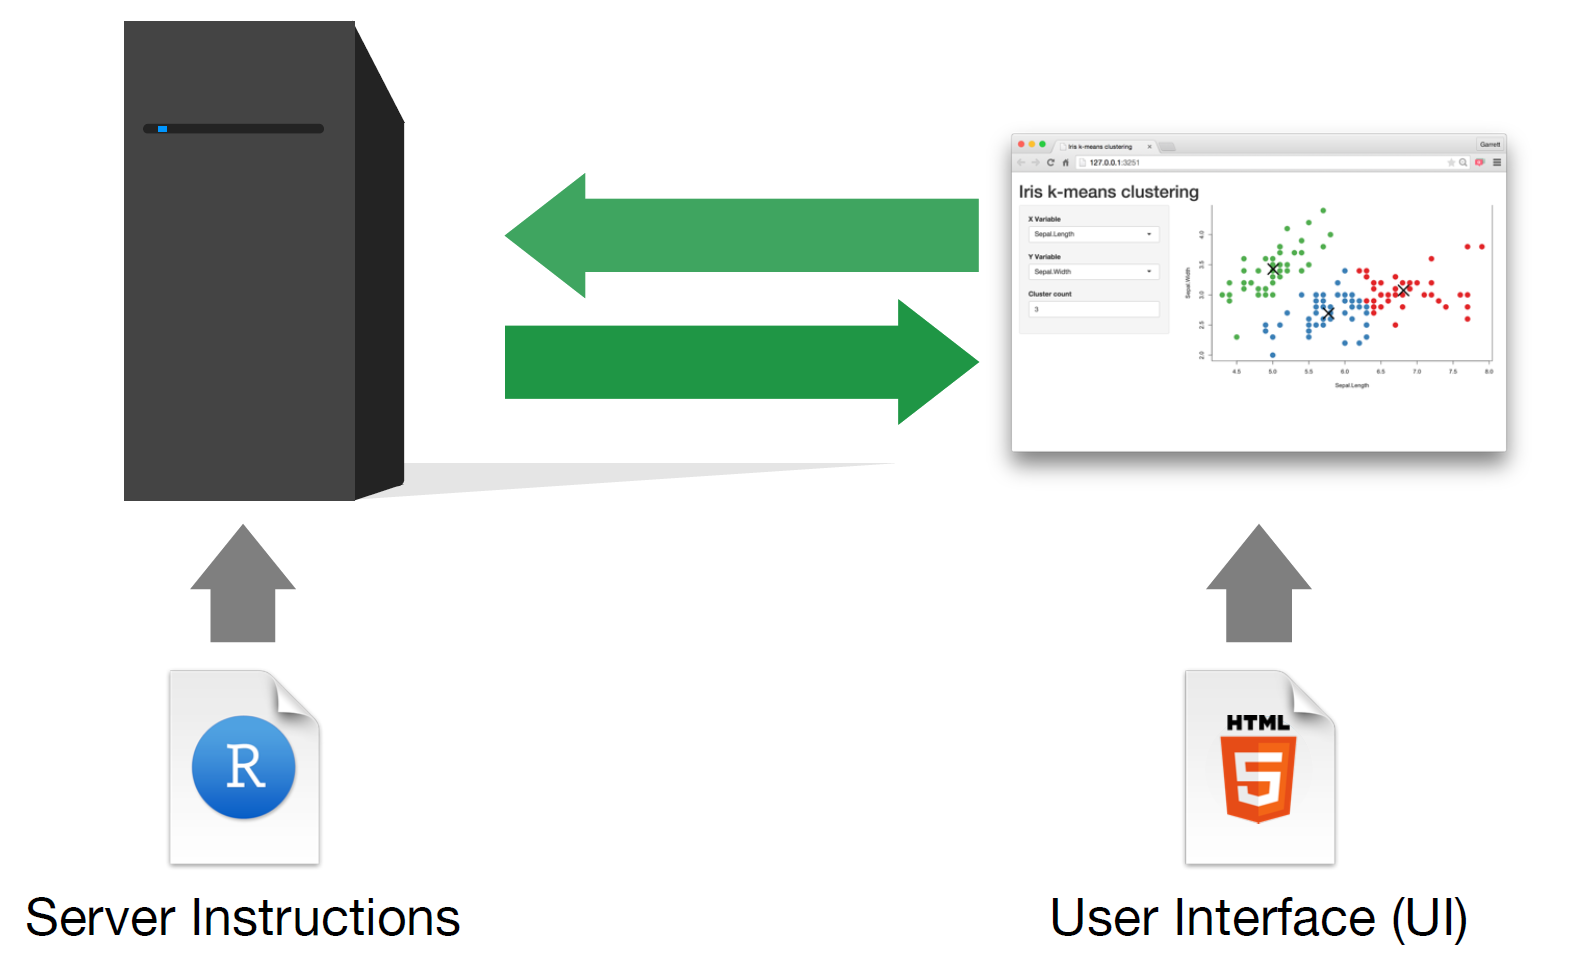
Let’s go into these components in compendiary detail.
1. UI
This is a file which will be saved as ui.R when we are bundling the application.
As the name itself suggests, it creates the user interface in a shiny application. It adds interactivity to the shiny app by receiving input from the user and accordingly displaying the generated output on the screen in a dynamic manner.
If you are interested in finding out the mechanics of how the reactivity of the Shiny application works, a good reference is the Reactivity - An Overview documentation by the RStudio team itself.
2. Server
This is a file which will be saved as server.R when we are bundling the application.
This is where the magic happens. The user interface configured in the ui.R file is basically a wrapping around the process defined within the server.R file.
In other terms, this is the file where the logic behind the application is coded and the pipelines are stored. Pipelines here means the series of steps to convert the input given by user into the desired output to be displayed via the user interface we have defined earlier.

3. The call for the shinyApp
The shinyApp function creates Shiny app objects from an explicit UI/server pair.
Enough about the overview. Let’s try to dive into the development of a shiny app now…
Initiating a Shiny setup
The initiation simply means the generation of the ui and server templates of the application through R/RStudio.
For this follow through these simple steps.
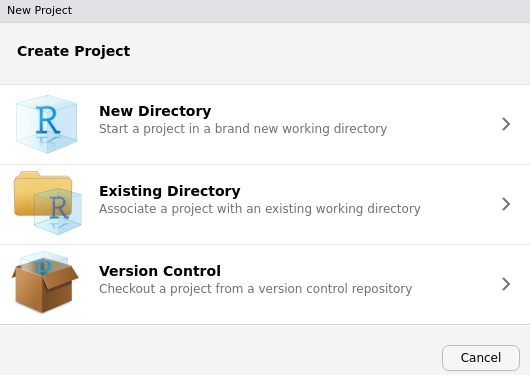
1. Create a new project in RStudio
Go to “File” tab and click “New Project”.
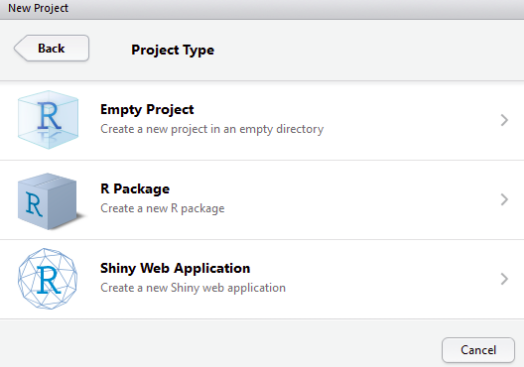
2. Select the type as Shiny web application.
When prompted to this screen, select the type as Shiny web application.
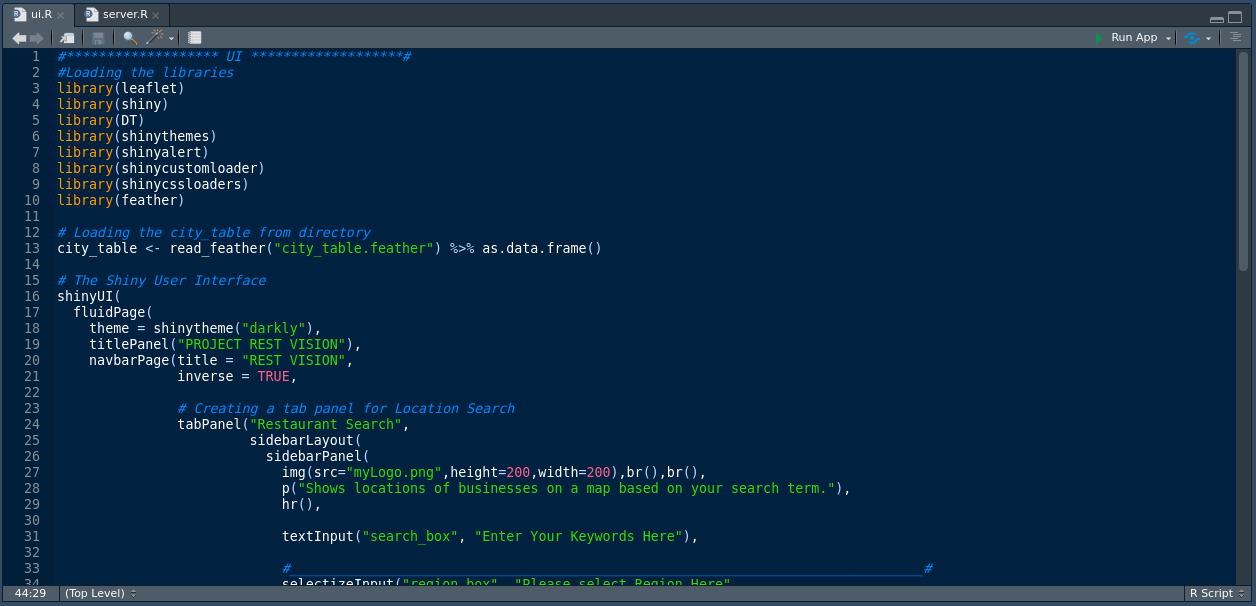
3. This will generate two R files as above with names server.R and ui.R
Once these steps are done, the next step is to code each of these files seperately with the user interface of desire within the ui.R and the fundamental logic and pipelines coded within the server.R.
Given below are the basic steps to create a simple ui.R file and a server.R file to generate a simple shiny app as a starting point.
An important fact to notice is that before the release of verion 0.10.2 of R, Shiny did not support single-file apps and the ui object and server function needed to be contained in separate scripts called ui.R and server.R as we are discussing here. But we can also include both the ui and server components in the same file which makes it convenient to share the application among the developers for testing and developers.
Please note that the components and the code given here are basic and depending on the complexity of the application intended to be built, more dynamic components and ionteractivity can be added to the ui and server file accordingly. As for this article, a basic ui and server logic are explained.
Coding the User Interface file
If you still haven’t installed the Shiny package, open an R session, connect to the internet, and run:

In-case this command does not work, try the following command which it will access the github repo for the shiny package and install it for you. For this you need to have devtools package installed.

After you have gotten the essential packages installed and loaded (using the library(“shiny”) command), the next is to put the UI elements in place to start building our app.
When creating a shiny application, the best way to ensure that the application interface runs without any lags and hassle even on different devices containing different screen aspect ratios is to use fluid page. This ensures that the page is laid out dynamically.
If you want to have an inspiration as to how general shiny apps look like, the Shiny package has eleven built-in examples, which you can run within the console since they are all self contained applications.
For now let us focus on a simple Shiny app written in the official documentation on Shiny for the ease of understanding the key concepts.
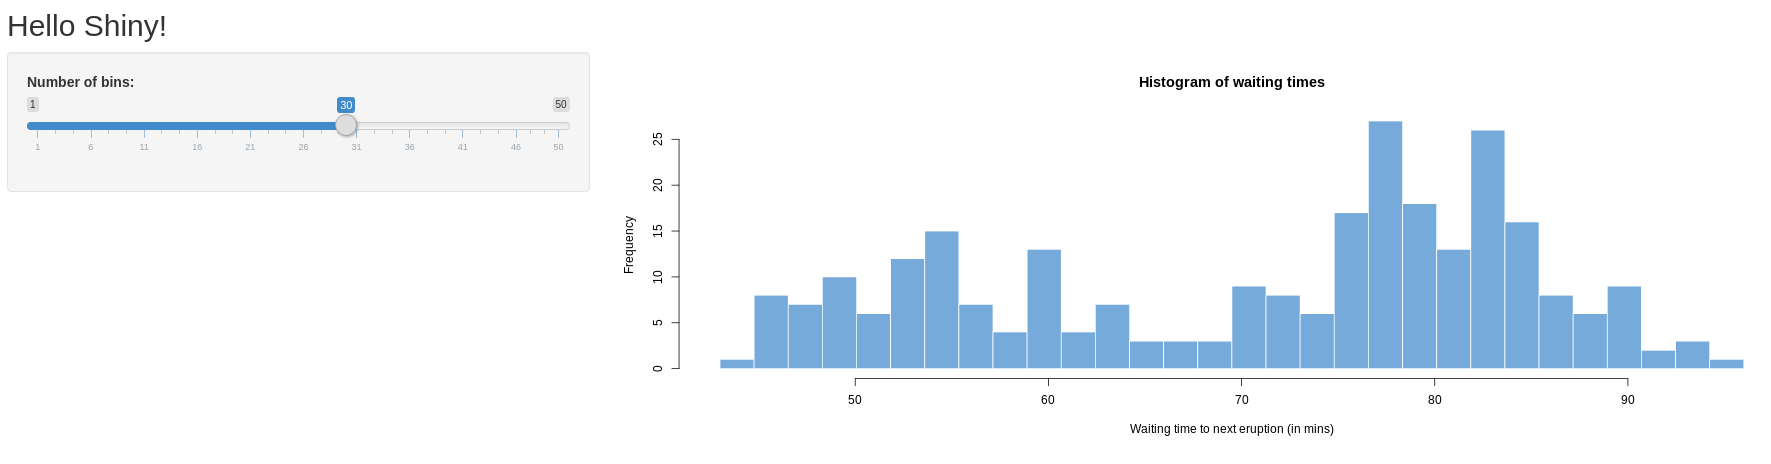
Here is the ui object for the Hello Shiny example:
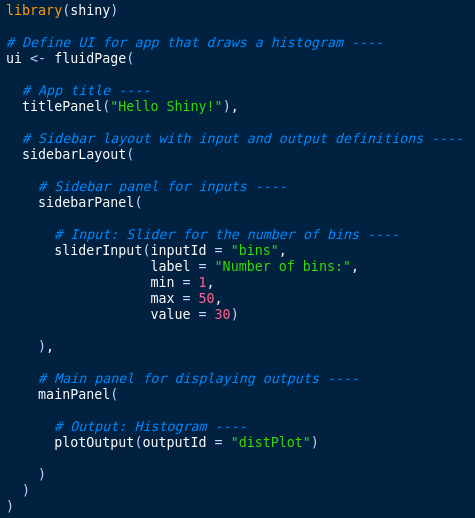
The user interface can be broadly divided into three categories:
-
Title Panel: The content in the title panel is displayed as metadata, as in top left corner of above image which generally provides name of the application and some other relevant information.
-
Sidebar Layout: Sidebar layout takes input from the user in various forms like text input, checkbox input, radio button input, drop down input, etc. It is represented in dark background in left section of the above image.
-
Main Panel: It is part of screen where the output(s) generated as a result of performing a set of operations on input(s) at the server.R is / are displayed.
Coding the server file
- This acts as the heart of web application.
- The server.R is written in the form of a function which maps input(s) to the output(s) by some set of logical operations.
- The inputs taken in by the components laid out by the ui.R file are accessed using the $ operator (Example: input$bins).
- On the other hand, the outputs are also referred using the $ operator (Example: output$distPlot).
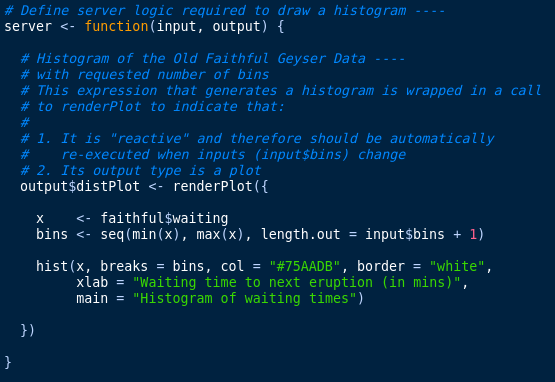
When looking at the server function, the Hello Shiny server function is basic and comprehensible. As per the logic of the server function, the script executes some calculations and the resulting histogram plot is generated along with the user defined number of bins, which was taken as input from the user interface.
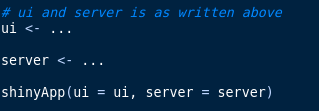
Calling the shiny app using the shinyApp function.
In your server.R file we will need to start with loading the Shiny package and end with a call to shinyApp to execute the written application:
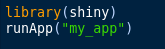
You can run a Shiny app by giving the name of its directory to the function runApp. For example if your Shiny app is in a directory called my_app, run it with the following code:
Or else, you can just click on the Run App button to run the script and execute the application.
How the final application looks like
The generated Shiny app looks as follows:
Recap of the pointers we have gone through
To create your own Shiny app:
-
Make a directory named “Your app name here”/ for your app.
-
Save your app.R script inside that directory. Or else you can create two different ui.R and server.R files and code on them.
-
Launch the app with runApp or RStudio’s keyboard shortcuts.
-
Exit the Shiny app by clicking escape.
Future steps
Once the application of your desire is created as above (Ofcourse with more complexity and elagence than this sample app), the next step would be to the world to view it and use it, be it within the corporation or general public.
This is where the deployment phase of the application comes in and we will be discussing more on how and what entails this endeavor of app deployment on another post.
Till then, Happy Shiny Coding folks…!!!


Comments